Livejournal Layouts/Overrides
Here are all of my old layouts, all together in one post. Please read the instructions for each layout, since they aren't always the same. I solely put these up as people were asking for them and I will NOT answer any questions or explain how to do this or that.
Rules
- No hotlinking.
- Comment if you like and/or snag, it's polite.
- Credit reverseview or this site (in your userinfo or your sidebar)
- Layouts come as they are. If you want your userpic to show, make the font bigger, ect. feel free to do so, but don't ask me how - I will not answer those questions or edit overrides for you.
- DO NO REPOST AS YOUR OWN I cannot stress this enough. If you want to make layouts and share them with others, start from the default Flexible Squares template & stylesheet.
These overrides will change the look or your journal: entry postionning, colours, etc. If you wish to edit your link list and such, you must do so yourself in the Customisation Area.
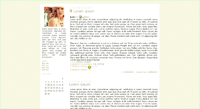
Layout #1 - Disparue
This is the first layout I ever put up and it has some issues with varied settings, but nothing too terrible :p

» download stylesheet & images
Installation
- Upload the images (user & lock icons) to your server or a free server.
- Go into Manage then Customize.
- Select S2 under Style System.
- Under Look & Feel, select Flexible Squares in the Layout & Language drop-down menu.
- Under Custom Options, select Custom CSS.
- Paste the CSS codes into the » Custom stylesheet field.
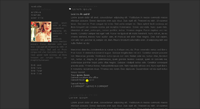
Layout #2 - Lime

» download stylesheet & images
Installation
- Upload the images (background, user & lock icons) to your server or a free server.
- Go into Manage then Customize.
- Select S2 under Style System.
- Under Look & Feel, select Flexible Squares in the Layout & Language drop-down menu.
- Under Custom Options, select Custom CSS.
- Paste the CSS codes into the » Custom stylesheet field.
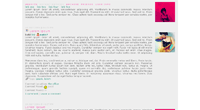
Layout #3 - Bananas Are Good

» download stylesheet & images
Installation
- Upload the images (user & lock icons) to your server or a free server.
- Go into Manage then Customize.
- Select S2 under Style System.
- Under Look & Feel, select Flexible Squares in the Layout & Language drop-down menu.
- Under Custom Options, select Custom CSS.
- Set the Use layout's stylesheet(s) drop-down menu to NO.
- Paste the CSS codes into the » Custom stylesheet field.
Layout #4 - Suit-Up

» download stylesheet & images
Installation
- Upload the images (background, user & lock icons) to your server or a free server.
- Go into Manage then Customize.
- Select S2 under Style System.
- Under Look & Feel, select Flexible Squares in the Layout & Language drop-down menu.
- Under Custom Options, select Custom CSS.
- Set the Use layout's stylesheet(s) drop-down menu to NO.
- Paste the CSS codes into the » Custom stylesheet field.
- Under Sidebar set Show the default user picture on the sidebar? and » Show the calendar in the sidebar? to NO.
- Set » First box in the sidebar to Links List and » Second box in the sidebar to Blurb (set the last 2 drop downs to calendar or userpic).
Layout #5 - Neutral

» download stylesheet & images
Installation
- Upload the images (background, user & lock icons) to your server or a free server.
- Go into Manage then Customize.
- Select S2 under Style System.
- Under Look & Feel, select Flexible Squares in the Layout & Language drop-down menu.
- Under Custom Options, select Custom CSS.
- Set the Use layout's stylesheet(s) drop-down menu to NO.
- Copy the CSS in the text area above and replace all the 'url_to_your_image_here' with the links to the images you uploaded.
- Paste the CSS codes into the » Custom stylesheet field.
Layout #6 - Greyscale

» download stylesheet & images
Installation
- Upload the images (user & lock icons) to your server or a free server.
- Go into Manage then Customize.
- Select S2 under Style System.
- Under Look & Feel, select Flexible Squares in the Layout & Language drop-down menu.
- Under Custom Options, select Custom CSS.
- Set the Use layout's stylesheet(s) drop-down menu to NO.
- Copy the CSS in the text area above and replace all the 'url_to_your_image_here' with the links to the images you uploaded.
- Paste the CSS codes into the » Custom stylesheet field.
Layout #7 - Borderless

» download stylesheet & images
Installation
- Upload the images (tag, user & lock icons) to your server or a free server.
- In Customise, under Look and Feel, set your layout to Flexible Squares.Under Custom Options, go into Presentation (first page) and select the Show user picture icons with each of your entries? drop down to YES.
- Under Sidebar, set all the dropdown menus you can to Yes.
- Set the following item order:
First box in the sidebar Link List
Second box in the sidebar Default Userpic
Third box in the sidebar Blurb
Fouth box in the sidebar Calendar - Under Custom CSS, set all the dropdown menus to NO
- Paste the CSS coding into the Custom stylesheet text area and select Save Changes
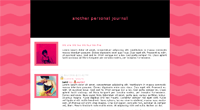
Layout #8 - Bubble-Gum

» download stylesheet & images
Installation
- Upload the images (background, user & lock icons) to your server or a free server.
- In Customise, under Look and Feel, set your layout to Flexible Squares.
- Under Custom Options, go into Presentation (first page) and select the Show user picture icons with each of your entries? drop down to YES.
- Under Sidebar, set all the dropdown menus you can to Yes.
- Set the following item order:
First box in the sidebar Default Userpic
Second box in the sidebar Link List
Third box in the sidebar Blurb
Fouth box in the sidebar Calendar - Under Custom CSS, set all the dropdown menus to NO
- Paste the CSS coding into the Custom stylesheet text area and select Save Changes
Layout #9 - Oxygen

» download stylesheet & images
Installation
- Upload the images (user & lock icons) to your server or a free server.
- In Customise, under Look and Feel, set your layout to Flexible Squares.
- Under Custom Options, go into Presentation (first page) and select the Show user picture icons with each of your entries? drop down to YES.
- Under Sidebar, set all the dropdown menus you can to Yes.
- Set the following item order:
First box in the sidebar Default Userpic
Second box in the sidebar Blurb
Third box in the sidebar Link List
Fouth box in the sidebar Calendar - Under Custom CSS, set all the dropdown menus to NOPaste the CSS coding into the Custom stylesheet text area and select Save Changes
Layout #10 - Elegant

» download stylesheet & images
Installation
- In Customise, under Look and Feel, set your layout to Smooth Sailing.
- Under Custom CSS, set all the dropdown menus to NO
- Paste the CSS coding into the Custom stylesheet text area and select Save Changes
Layout #11 - Block

» download stylesheet
Installation
- In Customise, under Look and Feel, set your layout to Flexible Squares.
- Under Custom Options, go into Presentation (first page) and select the Show user picture icons with each of your entries? drop down to YES
- Under Custom CSS, set all the dropdown menus to NO
- Paste the CSS coding into the Custom stylesheet text area and select Save Changes
Credits
(mini usericons and background other than those made by me)
http://www.graphicpush.com/
http://www.famfamfam.com/
http://www.everydayicons.jp/
_excentric_
damnicons
lovelamp
